Integrity - based innovation in science and technology Home|Favorite|Contact us
Name:Helen.
Tel:+86-755-82720811
E-mail:helen@chinalctech.com
Add:Room 301,Building No.3,Guole Technopark,Lirong Road,Dalang Street,Longhua District,Shenzhen 518110,China.
Online consulting
Features
1.Computer power on/off remote control
2.Auto poer on function(Enable this function with on-board switch)
3.Boot card supports 2.4G WIFI, mobile APP supports WIFI/4G/3G/2G
4.Computer real-time status feedback
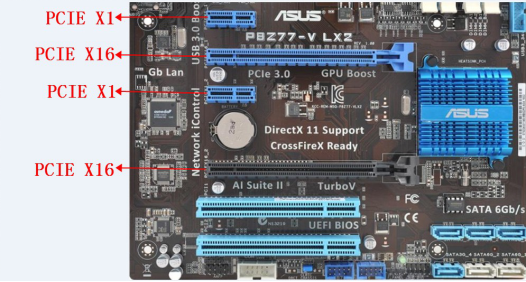
5.Compatible with PCIE X1, PCIE X16,etc. no extra driver needed
6.Equip with PCI metal dam-board, more secure
7.Opto-couplers isolation,no harm to your PC
8.Dual channel POWER SW interface design
Hardware introduction and description
1.Board size: 48.4*76.1 mm
2.Onboard source

3.Instructions
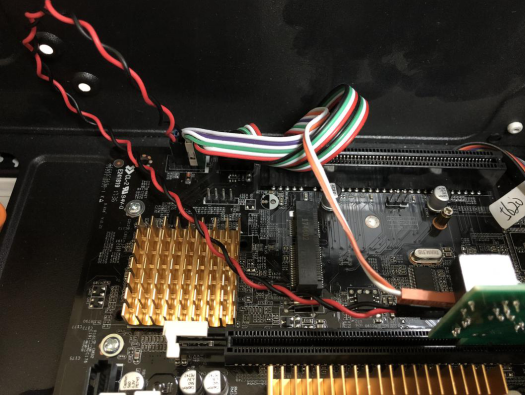
(1)Wiring and Installation
①Find the POWER SW interface on the motherboard of PC
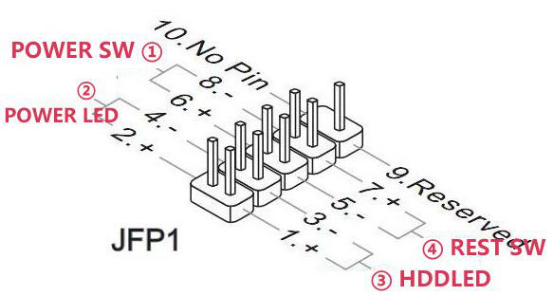
②Unplug the original POWER SW line and plug it into any channel of the module (for example: channel 1), then use the double-end wire attached to the module(for example: channel 2 ) and another end plug into the POWER SW interface of the motherboard. In this way, the computer can be remotely controlled without affecting the function of the original power button of the computer
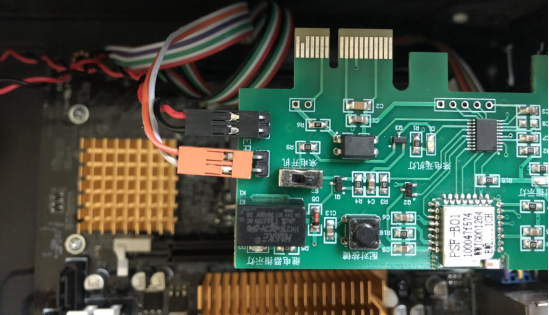
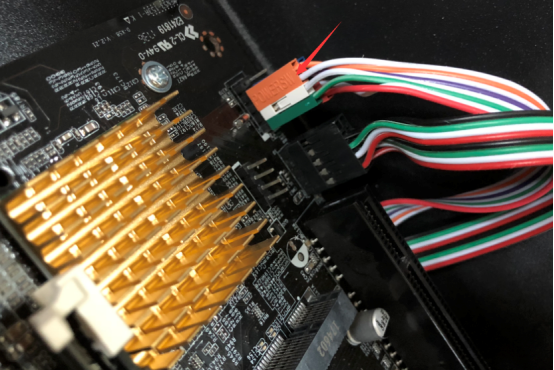
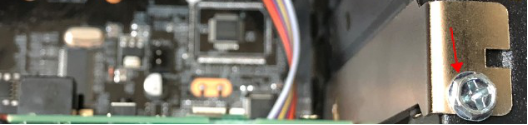
③Insert the boot card into the spare PCIE slot of the computer and secure the PCI bezel to the chassis
(2)Mobile APP control
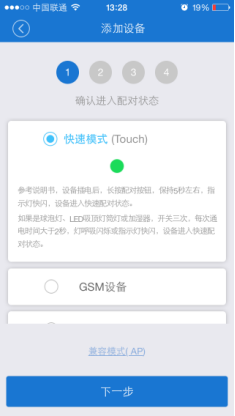
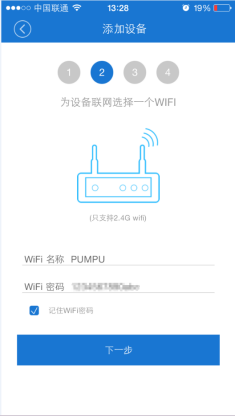
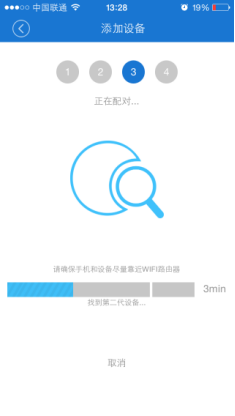
①APP downloading: Scan the following QR code or searching “eWeLink” on the application market

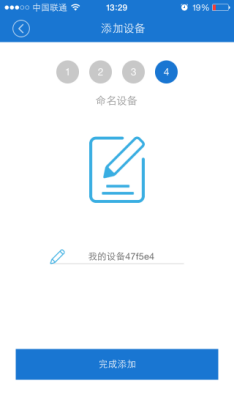
②WiFi configuration: Power on the computer, press the "Network configuration key" for more than 7S, until the "Network indicator" flashes 2 times and then lights up 1S, indicating that the APP is configured with a WiFi ssid and password. Open the APP, press the "+" key to add the device. After the addition is completed, wait for about 5S and the boot card is successfully connected. The "Network indicator" is always on. At this point, you can remotely control the computer by the APP.

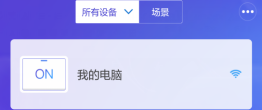
③Computer Status feedback: In the case that both the boot card and the APP are online, the switch status of the computer will be fed back to the APP in real time whether the computer is controlled by APP or power button in front panel.
●Boot card offline
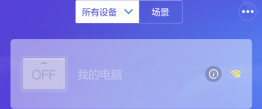
●Boot card online+PC power off
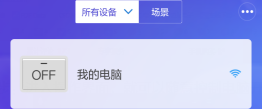
●Boot card online+PC power on
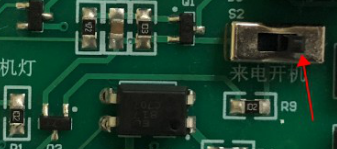
(3)Auto Power On function
Pushing the switch to right side can enable this function, then the computer will power on automatically after the computer connected to AC power (need to wait 5 seconds)
●Disable
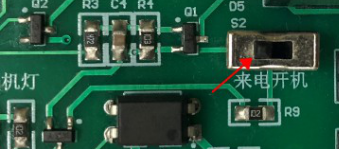
●Enable
© 2011-2024 Shenzhen LC Technology Co.,Ltd. All rights reserved.
Add:Room 301,Building No.3,Guole Technopark,Lirong Road,Dalang Street,Longhua District,Shenzhen 518110,China.
Tel:+86-755-82720811


Mobile station